CrossConnect for ARM Installation Guide
This document contains the following sections:
Installing CrossConnect for ARM
This section contains instructions for installing your CrossConnect for ARM hardware under Windows.
In order to use your CrossConnect for ARM you will also need to install CrossWorks for ARM version 1.3 or later.
System Requirements
CrossConnect for ARM is supported under the following versions of Windows:
- Windows XP
- Windows 2000
- Windows ME
- Windows 98 Second Edition
Installing CrossConnect for ARM Software from a CD/DVD ROM
- Put the CrossConnect for ARM installation disk into the drive.
- Run Setup.exe to install the CrossConnect for ARM configuration software.
- Attach the CrossConnect's USB connector to your PC, upon successful connection the power LED will illuminate and Windows will prompt you that it has found new hardware.
-
From the Found New Hardware Wizard select Install the software automatically and then click Next.

-
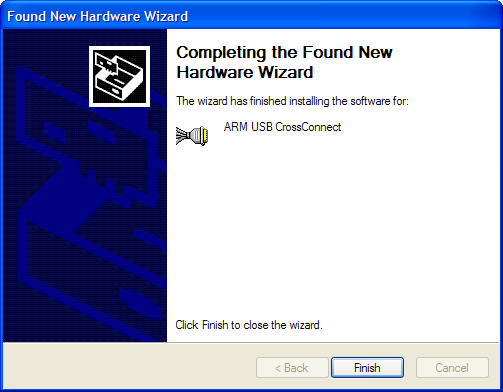
Windows will now install the CrossConnect for ARM software. When the installation is complete you will be prompted. Click Finish to close the wizard.
Installing a Downloaded Version of the CrossConnect for ARM Software
- Download and unzip the CrossConnect for ARM software.
- Run Setup.exe to install the CrossConnect for ARM configuration software.
- Attach the CrossConnect's USB connector to your PC, upon successful connection the power LED will illuminate and Windows will prompt you that it has found new hardware.
-
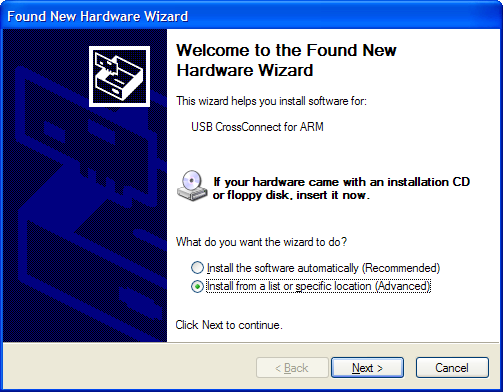
From the Found New Hardware Wizard select Install from a list or specific location and then click Next.
-
Select Search for the best driver in these locations, check the Include this location in the search option, select the directory that you unzipped the CrossConnect for ARM software into using Browse and then click Next.

-
Windows will now install the CrossConnect for ARM software. When the installation is complete you will be prompted. Click Finish to close the wizard.
Configuring CrossConnect for ARM
We have provided ARM7, ARM9 and XScale variants of the CrossConnect firmware in order to allow you to use the same hardware to debug all of these targets. In addition to this, we have provided a firmware variant for each target specifically optimized for either maximum speed or variable speed JTAG clock frequency operation. The maximum speed variant will drive the JTAG TCK signal as quickly as possible in order to provide maximum download and debugging performance. The variable speed variant supports adaptive clocking using RTCK and also JTAG TCK clock frequency division in order to support targets that cannot cope with the TCK frequency generated by the maximum speed variant of the firmware.
You can install the variant of the firmware you require using the supplied CrossConnect for ARM configurer utility xcconf.exe. By default this program is installed into the Start | Programs | Rowley Associates Limited | CrossConnect for ARM | ARM CrossConnect Configurer program group.
Once you have started the configurer, you should connect the CrossConnect you wish to configure to your PC (note that the configurer will only allow you to have one CrossConnect attached). Once you have connected the CrossConnect you should see displayed the device's serial number and the variant and version number of the currently installed firmware.
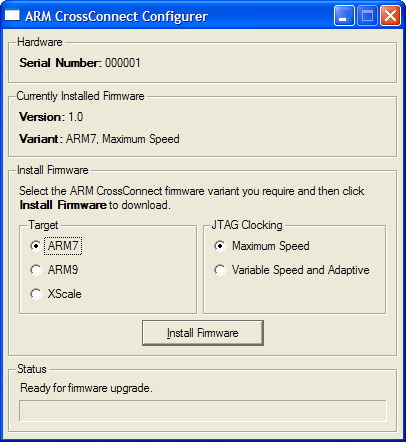
To upgrade or install a new variant of the firmware select the target and clocking variant you require using the radio buttons and then click the Install Firmware button to start the installation. When the installation is complete, the CrossConnect will automatically restart and the configurer's Currently Installed Firmware pane should update to display the newly installed firmware variant.
NOTE: When installing the firmware, it is important to not interrupt the installation program or remove the CrossConnect until the installation is complete. If the installation is interrupted, there is a possibility that the CrossConnect's firmware may be corrupted.
Frequently Asked Questions
Why am I getting a 'JTAG clock division mode is not available with the installed CrossConnect firmware' error message?
Why am I getting a 'Adaptive JTAG clocking mode is not available with the installed CrossConnect firmware' error message?
Why am I getting a 'The RTCK signal is not responding, disable "Active Clocking" mode' error message?
Why am I getting a 'ARM7/ARM9/XScale support is not available with the installed CrossConnect firmware' error message?
Why am I getting a 'Target not responding message'?
- Incorrect ARM debug interface type - Check that the Target | ARM Debug Interface project property matches the type of target you are trying to connect to.
- JTAG clock frequency too high for target - You should install the variable speed firmware variant using the CrossConnect configurer. If this still does not work try reducing the JTAG clock frequency further by increasing the JTAG Clock Divider target property or enabling active clocking by setting the Adaptive Clocking target property to Yes.
What configuration should I use to achieve maximum download speed?
- Disable JTAG clock division by setting the JTAG Clock Divider target property to None.
- Disable adaptive clocking by setting the Adaptive Clocking target property to No.
- Install the maximum speed firmware variant using the CrossConnect configurer.
I have the variable speed firmware variant installed and the JTAG clock divider set to 1, is this the same as having the maximum speed firmware variant installed?